Snowboy - A Stop Motion Project
Responsible for all aspects (including ideation, fabrication, animation, and compositing).


This was my first time delving into the full production pipeline of a stop motion short! For this project, I went from the ideation stage all the way through to final compositing. Creating a full animation in ten weeks was no small feat!
That being said, I am no animator, so I have only included a few of my favorite still frames from the project. I want to focus on my ideation and fabrication process, which I am especially proud of.
Ideation & Character Development
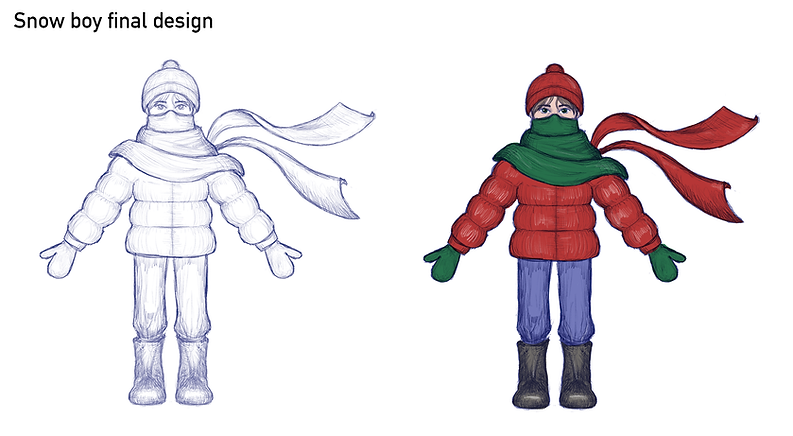
I started out with the idea of this young snow samurai character. I liked the idea of the oversized winter coat, the scarf hiding the majority of the boy's face. His hat would cover his eyes, making only his nose visible. His long scarf would flap in the wind, a telltale sign of an epic battle ahead. He would express himself not through facial expressions, but his body movement. The story behind this boy would be that he is playing in the snow, imagining this epic battle between him and the snowman he built. A duel between the boy, equipped with his shovel, and snowman, who uses a tree branch to fight with.
For the purposes of this stop motion project with it's time constraints, I settled for creating an animation of the boy building the snowman. (The duel is a current project I am working on, and will be done with CG!) For the animation, I felt that seeing more of the boy's face was important, as I had planned for a lot of close up shots to reveal the boy's emotions.
After sketching a couple variations of this character and through experimenting with different color combinations, I came up with a final design. The colors of his clothes ended up being dependent on what felt I could find at my local craft stores, which luckily was close to my vision!


Character Fabrication
Next came the how of this character's creation. I created a mechanical drawing based on the 11 inch height I decided for the puppet.
With the mechanical specifications set, I created of a wire skeleton and started building it up with clay. Sculpting the character was probably my favorite part of the whole process. With every change I made to the sculpt, I could feel the character coming to life.
Next came the casting of the clay sculpt in plaster. The sculpt was first encased in a softer clay, to form the temporary base of the plaster mold. After encasing the whole thing in foamcore board, the first half of the plaster was poured. After that layer was dry, the case was flipped over and the mixture was poured to form the other half. After everything finally set, I was able to crack it open and free my clay guy! I now had a plaster mold that was ready for use.
Creating the foam puppet was a faster process than I had prepared for. It only took around half an hour from the pouring of the foam mixture to the setting stage.
Now that I had a foam puppet, it was time for needle felting! It was my first time needle felting, and it was definitely an enlightening experience.
Though I was happy with the final felted look, there were many things I wish I had done differently. I decided I had wanted to needle felt my puppet around halfway through the entire process, so my puppet didn't have quite enough bulk to make the needle felting an easy process. I went through a lot of broken needles and creative solutions to get the felting to work. Due to time limitations. the scarf was hardly felted at all.


Some behind-the-scenes!


